Resurrecting a Hard Drive- From Cyclic Redundancy Errors to GRUB and Beyond
A tale of reviving a dying drive, juggling between Windows tools, Linux forensics, and sheer stubbornness.
The parts and parcels of this trade of time
Not all heroes wear anti-static wristbands, but if you’ve ever attempted to breathe life back into a failing hard disk, you’ve probably earned your badge of digital courage. Recently, I took a half-dead internal HDD from an old Lenovo laptop, got it converted to an external USB drive via a SATA adapter, and went deep down the rabbit hole to fix it — not to recover data, but to see how usable it could still be. Spoiler: I learned a lot, but it came at the cost of my time and minor stress.
Let me walk you through everything I did, what worked, what didn’t, and whether it’s worth trying yourself.
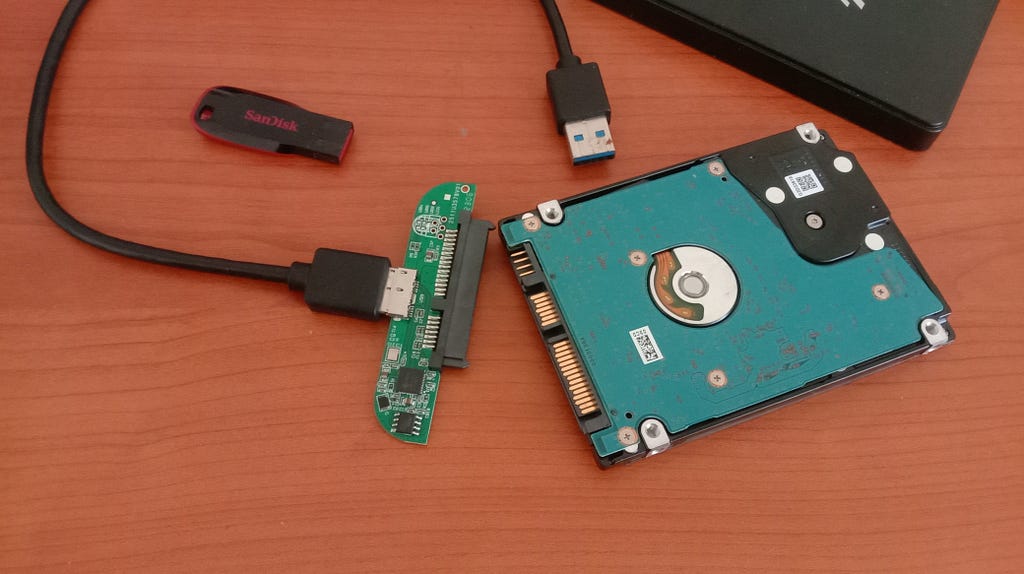
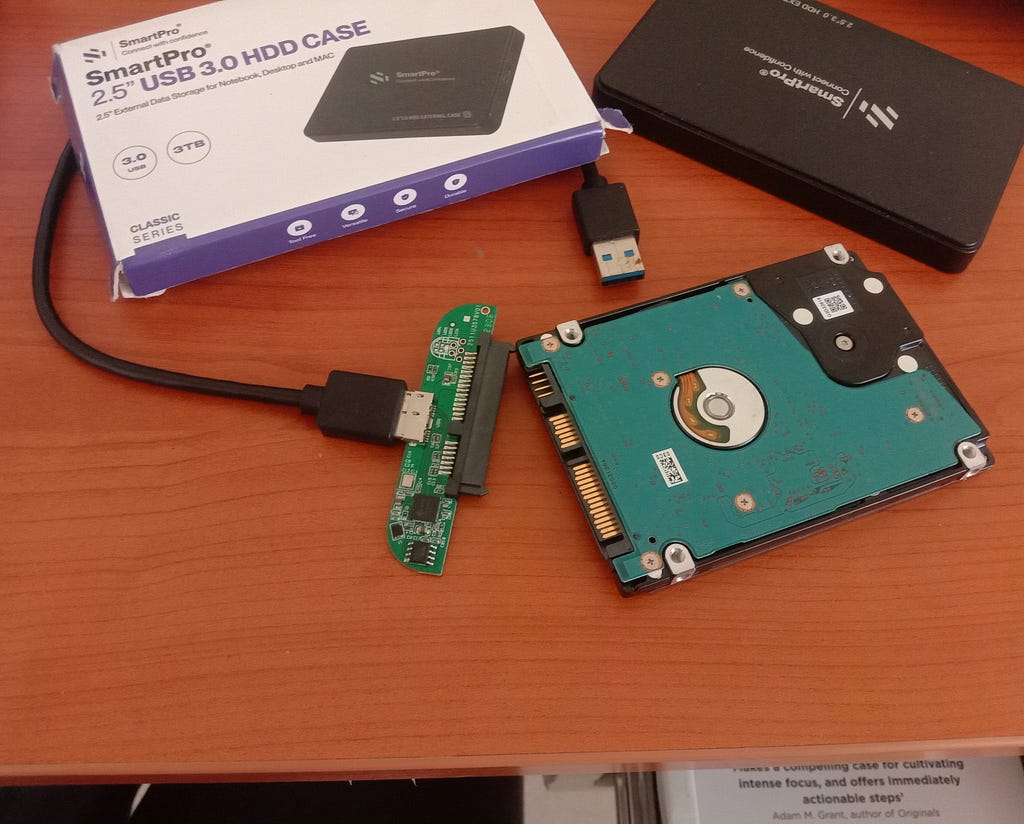
🔩 The Setup: Externalizing an Internal HDD
The starting point: a 500GB Toshiba laptop hard disk. I removed it from the dead laptop and used a generic USB-to-SATA cable to turn it into an external hard drive.
⚠️ The First Error: CRC (Cyclic Redundancy Check)
When I plugged it into Windows, Disk Management prompted me to “Initialize Disk”, but then threw the dreaded:
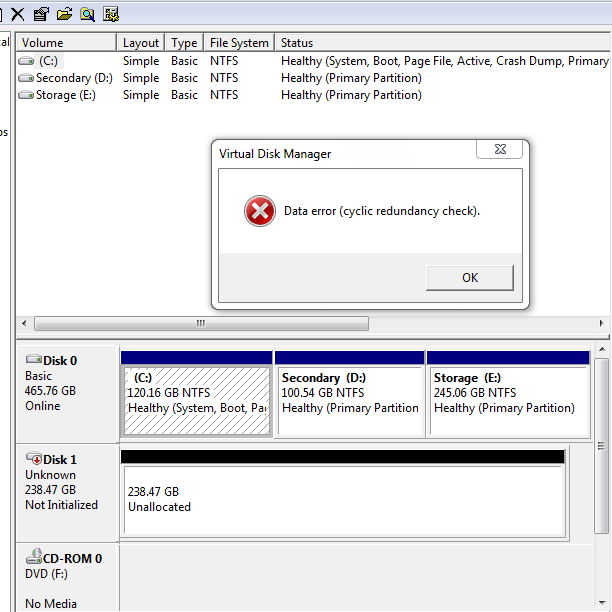
Cyclic Redundancy check error on Initializing HDD. (representational image)
This CRC error often indicates failing hardware or unreadable sectors. A quick reality check with chkdsk confirmed that NTFS file structures were mostly intact — at least from Windows’ point of view.
Fix Attempts: Tools I Used 🛠
1. CHKDSK from Windows Terminal
I ran:
1
chkdsk X: /f /r
Where X: was the drive letter assigned. Surprisingly, Windows didn’t find file system-level corruption. That gave me hope — maybe this wasn’t hardware failure after all.
2. SMART Diagnostics with CrystalDiskInfo + smartctl
I used both GUI (CrystalDiskInfo) and terminal tools (smartctl on Linux) to get the real picture. One of my previous disks showed:
- Current_Pending_Sector = 16,168
- Reallocated_Sector_Ct = 208
- ATA Error Count = 4852
If yours looks anything like that, it’s probably not worth reviving for anything critical.
The Experimental Phase: Linux to the Rescue
After some basic checks, I took a deeper dive with Linux:
3. badblocks: The Sector Hunter
1
sudo badblocks -wsv -b 4096 -o badblocks.txt /dev/sdX
This destructive scan took hours, but mapped out damaged sectors. I used that info to manually avoid bad regions while partitioning.
4. GParted: Manual Partitioning Around the Dead Zones
Once I had the map of bad blocks, I opened gparted and deliberately left unallocated space around those problem areas. I created healthy-looking primary partitions in the “good” zones.
Think of it like isolating rot in a wooden plank — you can still use the rest, but trust it less.
🐧 Can It Run Linux?
Yes — lightweight Linux distros like Lubuntu or Debian NetInstall installed fine (after multiple tries). I disabled swap and journaling (to reduce writes), and booted using GRUB from a separate USB bootloader.
However, boot reliability was… inconsistent. At times:
- The drive would disappear mid-boot
- dmesg would log repeated disk I/O errors
- Package installs would hang indefinitely
Clearly, I was on borrowed time.
Meanwhile, Back in Windows…
Switching back to Windows, I tried:
- Re-initializing the disk with MBR (not GPT), since it’s a 500GB drive and I didn’t need >4 partitions or UEFI boot.
- Running full CHKDSK /r
- Using it as storage-only, avoiding frequent reads/writes
This setup seemed more stable than running Linux directly from it.
Hardware Gotchas: SATA Adapter Woes
The USB-SATA adapter I used was temperamental — occasional power drops would reset the connection. You must use:
- A good-quality adapter with power boost (ideally dual USB or external power supply)
- A short cable to reduce resistance
- A USB 3.0 port for better voltage stability
If the drive disconnects often, it’s not just frustrating — it can damage your file system mid-write.
Final Verdict
Can you revive a bad drive?
Temporarily, yes.
Should you use it for anything important?
Absolutely not.
Despite all my work — diagnostic scans, SMART monitoring, partition gymnastics — the drive remained unpredictable. At best, I turned it into a semi-functional experimental sandbox.
📘 What I Learned
- CHKDSK ≠ SMART check — Windows may say it’s fine, while hardware-level diagnostics scream “help!”
- badblocks is powerful, but it’s not a magic fix — it just helps you understand what’s salvageable.
- Partitioning around damage works, but only for non-critical tasks like testing or training.
- Always suspect flaky SATA adapters when troubleshooting external HDD behavior.
- Once the sectors start dying, the drive is already dead. You’re only squeezing the last bits of life.
Advice from this experience💡
If you’re in a similar situation:
- Use CHKDSK first — it’s fast and safe.
- Then boot into Linux for badblocks and smartctl.
- Partition wisely.
- Never trust the disk with personal or irreplaceable data.
- And when you’re done tinkering?
Back up. Then bin it. You’ve already won by learning how far you can push failing hardware.
Thanks for reading! If you’ve tried reviving a hard disk like this, or used Linux to fix what Windows couldn’t, I’d love to hear your stories. Drop a comment — or a cautionary tale.
